Review: DroboPro
When I first started with photography, I shot mainly slides. I framed them, put them in a box, and the box went into the closet. After a while I started scanning some of my slides onto my computer for some additional work in Photoshop, and suddenly I had a digital backup of my best pictures on my Mac. But shooting slides was a pain, so with the introduction of digital photography I simply couldn’t wait to jump to the other side.
My first DSLR was a 6MP Nikon D70. It took some time to get used to the flat and uninspiring RAW files compared to the high contrast and vibrant Velvia slides, but I soon realized there was no way back.
Initially, the size of the RAW files coming straight from the D70 seemed to be an improvement compared to the drum-scanned slides that were a 100MB each. But with slides I didn’t shoot much, as it was rather expensive. RAW files don’t cost a thing, so I shot much more than before and as a result my computer started filling up quickly. At the same time I also realized that my images were pretty vulnerable in case of a hard drive failure.
I decided to get myself a new computer with more internal storage, and buy an external hard drive to backup my images. This worked well. Every now and then I just updated the data on the external drive and I felt pretty well organized and safe.
I then upgraded to a 12MP Nikon D2X. I also started traveling more, shot considerably more images, and the computer was filling up again. So I added a second internal drive and bought a second external drive for backups.
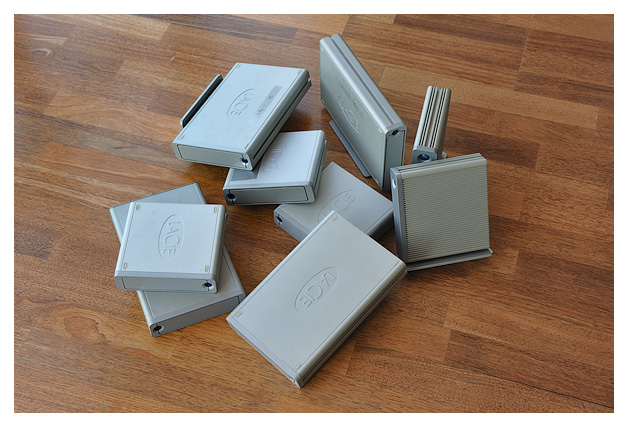
And then I bought a second body, a Nikon D2Xs, shot more images than ever before, and in no time I was facing the same problems again. I needed more disk space, and I wanted more processing power to handle my every increasing Photoshop files sizes. So I bought a new MacPro. Four internal hard drives, 1TB each. The external drives had to be upgraded as well, so I bought four external drives of 1TB to mirror the content of my computer. But what if my house would catch fire, or if I got burglarized and someone took all my computer stuff? I needed a second backup to keep off-site. More external drives.

Part of my external hard drive collection.
By the time I had stored all my data in three different places, the whole backup thing had become very time-consuming and confusing. Using ChronoSync helped to make the process go faster and easier, but it became clear to me that if things continued like this, I could build my own Great Wall out of external hard drives.
I managed to keep things going until last year, when my MacPro was getting full again – the result of traveling most of the year with a Nikon D3, D3X and D3s. Three of the four 1TB drives were full, only the HD still had some space left. I like to keep all my images inside my main computer, so I had to do some sort of upgrade again. The internal upgrade was not a difficult one – simply replace all the drives with 2TB versions. But the external upgrade had to be changed once and for all. No way I was going to buy more external drives. I had been looking into multi-drive RAID boxes before, but it was all very intimidating and I like to keep things simple. That’s when I read about the DroboPro – its seemed like the perfect solution to my problem.
Storage that manages itself
The DroboPro is basically an 8-bay external hard drive that can dynamically expand storage any time, and that is self-managing and self-healing. That almost sounds too good to be true, so how does it work?
The DroboPro uses Data Robotics’ BeyondRAID technology. It lets you add hard drives on the fly to increase your storage capacity when needed. This means you can just buy the storage you need now and change it as your data grows. Not only that, it doesn’t even matter what size, speed or brand the drives are, and you can add, remove or replace a disk at any time. Virtually any 3.5″ SATA drive can be used – simply plug in a few drives and the DroboPro automatically starts doing the work. Redundant data protection without the complexities of traditional RAID setups, which require the use of equal sized drives.
The dynamic storage expansion and the fact that even I could understand how it works made me want one.
Packaging and unboxing
My new DroboPro arrived in a sturdy box that was at least twice as big as the product itself. Once opened, it was clear that Drobo doesn’t trust couriers to handle packages gently, and rightly so. The DroboPro itself was surrounded by a good amount of black foam and had a smaller box on top with the cables, manual and setup guide.
Box contents:
-DroboPro
-Two power cords
-USB 2.0 cable
-FireWire 800 cable
-Ethernet cable
-User Guide and Quick Start Instructions
-Resource CD (Drobo Dashboard application and Help files)

You open the box, and you’re welcomed – nice.

All the smaller items are neatly organized.

Resource CD, Drobo User Guide and instruction card.

Underneath the smaller box lies the DroboPro itself.

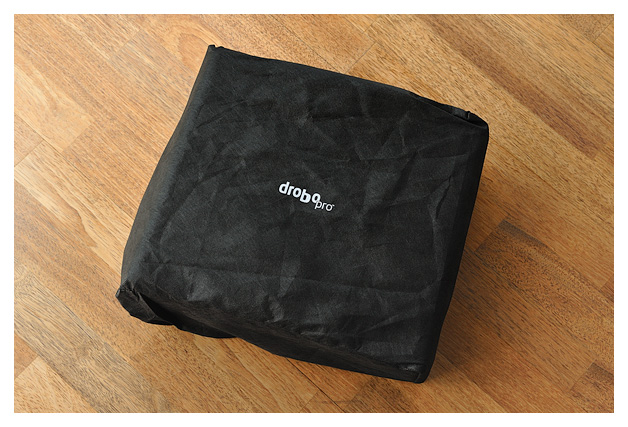
The Drobopro is protected by an extra cloth wrapper.
The DroboPro is a well designed, somewhat heavy machine. All the vital parts are behind a black metal sheet, the front and the back have glossy plastic covers. Normally, you would instinctively try to hide your backup system under your desk or behind the closet, but the DroboPro is so good looking that I decided to put it on my desk. And yes, those lights look pretty cool.

You’ve gotta love the design.
The front cover is attached to the main body with a magnetic strip – to remove it is a breeze. Behind the cover you can see the 8 bays where the drives should go. And it’s as simple as it looks; just slide it in and you’re in business. On the inside of the front cover is a handy reminder of what the different lights mean – good thinking.

Behind the front door of the DroboPro.

The backside of the DroboPro.
Getting Started
Unpacking the DroboPro was the easy part, the serious bit was next. Luckily, according to Drobo’s website, this should be just as simple. “If you can figure out a traffic light, you can figure out a DroboPro” is what they say. What they mean is that the green, yellow and red lights on the front tell you exactly what’s happening and what you need to do.

The lights work the same on all Drobo models.
I’m lazy by nature, so I decided to not read the manual and only have a quick look at the Quick Start Instructions and install the Drobo Dashboard application.
Hooking up the device to the computer took under a minute, and so did installing the software. I switched on the DroboPro, removed the front cover, and opened the Drobo Dashboard application. All the lights underneath the 8 bays turned red: add a drive here. I took one of the four 2TB drives that I bought (the same as the ones inside my MacPro, but this is not necessary) and pushed it into one of the 8 bays. Immediately the little light underneath the bay started flickering yellow and green: don’t remove this drive. The DroboPro had started initializing the drive. I then added the remaining three drives and waited until all lights were green.
Meanwhile I had a look at the Drobo Dashboard user interface. This turned out to work just as intuitive. I created a single volume on my desktop and called it “Drobo”. As a maximum capacity I entered 16TB, even though at the moment I only inserted 4 drives with a total of 8TB. The DroboPro separates the capacity of the arrays from physical capacity. You specify the capacity of the array when it is created, but this capacity has nothing to do with the number or size of drives installed. You set your volume size once and you create your partition on that volume size once. If later on you want to expand the available storage by adding or replacing drives, it will never require the extra steps required by a traditional RAID system. With the DroboPro there is no need to predict the exact right size in advance.
As I work with four internal hard drives, I decided to create four partitions on the Drobo volume: three for my image drives, one for my main hard drive containing my system and applications. You have the choice of Single Disk Redundancy (protection agains a single disk failure) and Dual Disk Redundancy (protection against two disks dropping out). Earlier, I had calculated the difference in terms of available storage with the Capacity Calculator on the Drobo website. This was just a matter of dragging the drives sizes that you are planning to use onto the bays. Dual disk redundancy is obviously safer, but it takes up a lot of capacity, so I decided to go for single disk redundancy.

With single disk redundancy I have 5.44TB space available.
You can combine different sizes and brands.

With dual disk redundancy half of the capacity is used for protection.
With all lights green and and everything ready to go, I went to DroboCopy in Drobo Dashboard and started the copying of my drives. I did this manually the first time, but you can program DroboCopy to to make backups automatically at any given time.
As simple as everything might be, there will always be stuff you don’t understand or would like to know more about. The Drobo site offers a wealth of information. You can learn how to get the most from your Drobo through their Video Learning Center. I particularly found the digital photography workflow video on the Drobo Broadcast Network very interesting, as well as some of the Drobo In-Depth videos.
Performance
Copying over 3TB to an external device can take a long time, and it did. I don’t work directly off the DroboPro, so it wasn’t a problem, but it took longer than I thought – a few days. My guess is that for a large part this is caused by the fact that not only was there a lot of data to be transferred, it also had to be organized and redundant across the drives. After the initial synchronization was completed, I changed the DroboCopy settings to let the DroboPro automatically backup my drives at the end of each day. This worked like a charm. All the consecutive backups were fast and flawless.

A simple pie chart shows the status of the DroboPro capacity
No complaints then? Well, there is one thing that I don’t like about the DroboPro: the sound it makes. It is supposedly “desktop quiet”, but I’d say it’s a bit noisier than that. It’s not so much the fans that create most of the noise – I don’t think I’ve even heard the fans at all – it’s the drives themselves. Sure, I expect the thing to make all kinds of sounds when it is working, but even when the backups are finished the DroboPro keeps producing sounds. My guess is that this is caused by the fact that there is simply a lot of empty space inside the device, because in my case it’s only half full. That empty space turns it into a subwoofer and emphasizes the sounds coming from within. I expect to hear a lot less when all the slots are full.
That said, the sounds from the DroboPro are constant – it never stops. I expected the machine to become silent when there’s no activity, but it doesn’t. It makes me wonder what the DroboPro is actually doing when I’m not doing anything. It doesn’t have a sleep mode, so you have to turn it off completely to make it stop. This is not a major issue though, because I have programmed the DroboPro to start working when I have stopped myself.

The DroboPro in the lion’s den.
Conclusion
There’s a lot to like about this black beauty. It is incredibly simple to use and involves zero management. Single and dual disk redundancy with a click, flexible “pay-as-you-grow” expansion, and no need to predict the exact right size in advance. If you’re looking for a simple, safe, flexible and scalable solution, and you don’t want the complexity and restrictions of traditional RAID systems, then the DroboPro is the way to go.


